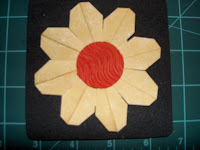
Jackie was back today and had a lot of ideas share from the convention she attended. She had tons of cards and 3D projects to share. I did not take my camera with me so I could not take pictures. Below are the two cards we made today. Oh, we will be doing a card swap at our last meeting this year. How exciting! We need to make 12 cards.
Lynette made me a small picture album with our baby shower pictures. It was so adorable. I want to post it but it has everyone's pictures so I am not sure if I should. I will follow her instruction and make a new one w/o the pictures and will post it (as soon as I can). Thanks, Lynette.
Saturday, February 28, 2009
Flower Card w/ tag punches
Flower is made very much like the pin wheel (see previous posting). You will need same materials as pinwheel (6 tag punches & 2 circle punches - no brads). At the party we used stem and petal stamps which I do not have. I used a stem/leaves stamp I had from CTMH.
Step 1. Fold the six tag punches as shown below (in half then fold the half diagonally). Then place them next to each other in quartered circle as shown in the pin wheel card. Only thing to remember is to use removable tape/glue for the first petal since you need to lift the first petal slightly to fit a small part of the last petal under it.

Step 2. Once the petals are glued, you can you can put a circle at its center. You can use a stamp from stampin' up to jazz up the circle. I used a textured red scrap paper.

 Step 3. Lastly I place the flower head on a card then use stamps for stems and leaves. I guess you can draw them in as well.
Step 4. If you want to embellish it or stamp a word you can do so.
Tuesday, February 3, 2009
Pin Wheel Card
Direction for making the Pin Wheel Card:
1. To make the pin wheel, you will need one brad, two round punches (use circle punch from Stampin' Up - any size), and eight tag punches (use either Stampin' Up small or big tag punch).
2. Fold the circle punch into a half then half again making four equal quadrants. You will be pasting two folded tags in each quadrant.
3. Fold the tag punch so that bottom of the tag lines up with the adjacent side of the tag punch.
5. Repeat steps 3 & 4 to eight tag punches then paste two folded tag punches in each of the four quadrants of the circle.
6. Place the other circle punch on top of the pasted tag punches in step 5 then place the brad in the middle of the circle.
7. Place the completed pin wheel on the card. Put the brad through the card if you want the pin wheel to move or if you don't have a brad, you can simply glue everything onto the card (in this case, pinwheel will not move).
Monday, February 2, 2009
Stampin' Up Party 01/31/09
I love all three cards we made at our last meeting. Thank you Kim. They are all so cute and pretty easy to make. The first project is a flower made from tag punches; second is a pinwheel made from tag punches; and last project, we used self adhesive address labels to creative separated wall panel effect. See the picture. I am going to write the direction for the pin wheel card in my next blog.
Subscribe to:
Comments (Atom)


